
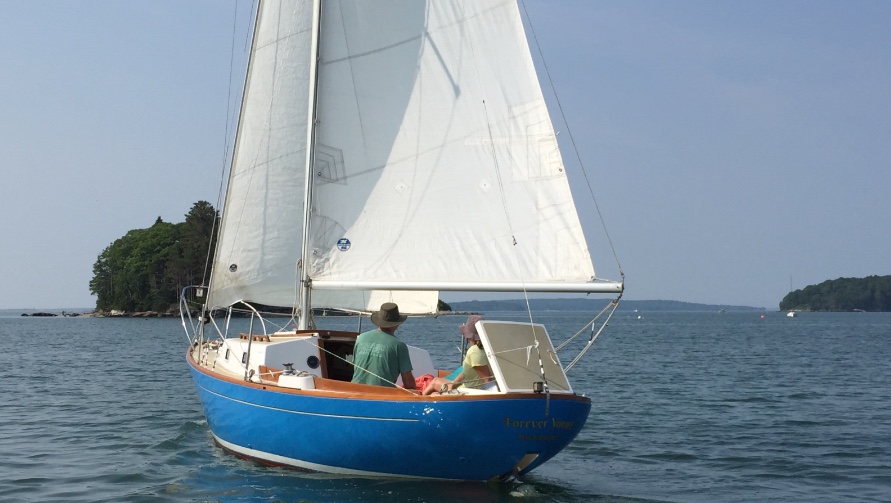
There are many beautiful Q24s sailing about, so it’s only right and proper that we have a page devoted to them. So here we are! If you own a 24, you’re welcome to post. I’m happy to add pictures, too. To post a new comment, you’ll have to scroll to the very bottom of this page- all the way down. I’ve managed to change the formatting to display just the newest comments first, so scrolling down is no longer so tedious. All of the older comments are still here though. Just follow the link at the bottom of this page.


Has anyone successfully repainted their decks. My are a beige color and there are a number of places that the white is showing thru. The surface still has good gripping texture, which I will probably loose if I paint with a two part epoxy. The price I got from a yard was $3,000. Which makes me want to do it myself or leave it alone.
I owned hull #4 for 10 years. I used System 3 Waterborne polyurethane on the deck – for both smooth (white) and non-skid (tan) areas I mixed non-skid granules into the tan paint. It held up extremely well and the San Juan Tan color is a beautiful light beige – no pink tones. Really nice next to the white areas. The paint has little or no odor and dries so quickly that you can apply three coats in the same day. Cleans up with water diluted with denatured alcohol. Highly recommended for your decks. You can get it at Jamestown Distributors online.
Joe Conron
ex 1978 CE Ryder Quickstep #4
Thanks,I’ll look into it.
John Quirk, here is an early model Q24 Frankenboat with a bowsprit/ cutter rig for sale in Rhode Island. Price seems to be going down by the minute. Went down to 1500 just today. Incredible price…or are sailboats boats just that hard to sell these days?
sorry forgot the link!
https://newlondon.craigslist.org/boa/d/1979-quickstep-24-sailboat/6245551587.html
Greetings. I’m the proud new owner of a QS24. No sail number, but the hull serial number isLNUKS197L990. Would that indicate that the hull is number 0? She’s on the hard in RI, and I’m planning on sailing her home to Ithaca, NY via LI Sound and NY waterways (Hudson and Erie Canal). I will have may questions as I work to get her ready to sail next summer. Your comments will be appreciated.
OK, I’ll work on my typos. Would that indicate that the hull is number 99?
Thx. EP
Still working on my typos! hull 90…. Lord, help me.
Looks like construction of your boat began in December of 1989 and the boat is a 1990. Hull # would be 197. See below.
HINs By The Numbers
A typical hull identification number (HIN) consists of 12 letters and numbers, as in ABC12345D404.
Here’s what the letters and numbers mean:
ABC: This is the U.S. Coast Guard-assigned manufacturer identification code (MIC). Go to the USCG Manufacturers Indentification page to access the Coast Guard’s MIC database.
12345: This is the serial number assigned to the hull by the manufacturer. This may be a combination of letters and numbers. The letters “I,” “O,” and “Q” are excluded because they could be mistaken for numbers.
D: This is the month of certification, indicating the month in which construction began. “A” represents January and “L” represents December. In our example, “D” means April.
4: This is the year of certification. The number is the last digit of the year in which the boat was built. “4” in this case designates 2004.
04: This indicates the boat’s model year.
Welcome to the fleet! Cayuga lake will be a wonderful sailing grounds for a QS24. Good luck on your ambitious maiden voyage.
Fleet. First season for my QS24 so still sorting things out. I’m missing the mainsail gate so the sail slugs fall out very time I raise or lower the main. Rig-Rite sells a generic mainsail gate but before I go on a wild goose chase can someone send me picture of what’s supposed to be there. Thank you. Dave E-Mail DPurnhag@Optonline.net
https://www.westmarine.com/buy/davis-instruments–sail-track-stops–P002_068_001_505?recordNum=1
Hi Dave
We have no problem flaking. We use the halyard to raise the boom to its normal height by hooking it under the reefing hook. this keeps the head of the sail down and the boom up.
works fine.
Mark
I’m missing something here. My boom is immovable – the gooseneck is riveted to the mast.
oh ok. Mine isn’t.
Hello Dave: I made my own gate. Thought the original was ng. I like windy days and so have to reef. Takes seconds if you are set up right. I like my sail lugs to move absolutely smoothly through the full range of the track. I made mine out of some anodized aluminum from a mast cut off a local marina gave me (bent masts are common around me after huricaine Sandy) but you could make a really sweet one out of pvc sched. 40 pipe from HD or Lowes. Cut to shape and heated sufficiently over the stove pvc can be shaped to whatever you need. Drill and tap and install. I will send you a pic of my current gate now and one or two others later in week.
Dave, Had a few minutes to kill, just made a gate out of sched 40. Took me 20 mins start to finish. Not the prettiest but given I did not do any careful shaping or finishing it will still last a lifetime and work real well. Sending photos to your email. cd
Chris, never thought of PVC. My job will be a little easier since the slug window is only to the starboard side of the slot. ..Thanx for the photos! Dave
Dave: I forgot to mention once you cut the pvc to the half round size all you need do is heat it over a stove slowly while GENTLY clipped in vice grips or even at your boat with a berzomatic torch until it gets mushy,,,about 1 min or less. Be careful, if you heat it too fast it discolors. Then pick up with a cloth and place against your mast where you will be installing it and allow it to cool into shape while holding which will create exactly the shape of your mast. Then sand ,shape, finish. As you saw I drilled and tapped my mast for annual removal. You could simply use 3m 4200 or 5200 as well if you leave your mast up over the winter. Just apply some 3m and wrap the mast and pvc moulding with some electrical tape for the night. The adhesive will hold it just fine if you are adverse to any drilling.
I’m am putting my Quick step 24 (#196)up for sale. The boat is in excellent condition . The boat has a new algrip navy blue paint . The bright work is maintained yearly. Anyone interested can contact me at Johnbquirk@yahoo.com
Hello! New member of this group. I have a Quickstep 24, and need some information about rudder bearing repairs. My main question is: How do you remove the rudder? The upper and lower bearings are both worn. I can vertically lift the rudder enough for the lower pin to clear the lower bearing, but I do not see how the lower bearing can be removed so the rudder can be dropped. Is it all just fiberglassed in place? I see a thread above, but it does not answer my main question, how is the lower bearing assemble attached to the rudder skeg? I have not yet removed several years of bottom paint. Is the bottom section come off, but mine is simply painted over so much I cannot see the seam? Thanks! Jeff aboard ALIZE in Solomons Maryland.
See Chis D. post march 24, 2016. He has done this and has a video he made of the repair.
Mark Prueser
Mark, that would work but 3 or 4 slugs come to rest below the window and the main wouldn’t flake down correctly.
Jeff, I think all your questions are answered in my back and forth with Mark Preuser from 3/28/16 to 5/29/16, maybe go back and read again.
If you go to the link of my repair pictures (3/31/16) the password is ‘rudder’. The picture hosting site stinks and you have to be patient and try different things as well as constantly x out the adverts. Each picture has dialog with it which shows when you click on the individual thumbnails. The rudder is a problem on a lot of 24’s. The upper rudder tube slop can be eliminated by inserting shim stock also described in the date range given (05/29). Like it or not that’s how they made them. Easy fix though. There are other quick and dirty ways as well.
Chris & Mark,
Thank you! The password allowed me to see the photos, which confirmed what I gathered from the discussion, that you repaired the rudder without removal. I would prefer to remove the rudder. How is the rudder removed? I would prefer not to cut off the bottom section of the skeg, but it may be the most expeditious. Once the tiller head is removed from he rudder shaft, is there enough play in the upper bearings to pull the lower end aft, then drop the rudder with shaft out? On previous boats, I have successfully used split nylon bearings, which have lasted many years, even on a spade rudder. Thanks! Jeff on the Chesapeake.
Once the tiller head is removed from he rudder shaft, is there enough play in the upper bearings to pull the lower end aft, then drop the rudder with shaft out?
Answer to above..negative. There are NO bearings..see below.
If you want to remove the rudder, get the saw out and cut off the lower pintle or at least enough to achieve what you want, not really a big deal, though not sure why you are so inclined. Read below again,,,there are no upper bearings. Some repair the upper tube by simply sealing it at the bottom and filling from the top with epoxy mixed with max amount of graphite. Let that set and then yank on the rudder. It fills all the available play with the lubricating mixture and fixes the problem. I would lubricate my rudder post before doing this epoxy repair. It would suck with high vacuum if you did this and ended up epoxying your rudder stationary forever. I like wax, epoxy is unaffected by it. Same with the lower pintle. Raise your rudder where you want it to live, support it, then build a dam around it and fill around the worn area in the pintle with the same pox/gragh mix. When that kicks, your rudder is in place and lubricated for the next 30 years, nice and quick and easy. Soda bottle strips worked for me are easy to do, easy to replace, Just think of them as cheap split bearings, cause that’s what they are. Remember it is only a pvc tube. Where will you put split bearings much thicker than a soda bottles plastic? My rudder is free of play and no water comes up while motoring any longer. I can not ask for more.
Mark Prueser
May 29, 2016 at 7:42 am
Chris D. Did you replace the upper bearing at the same time you did the lower bearing? After sailing Summer Wind for a couple of days I see there is a lot of slop on the tiller. When I had the boat out of the water, looking at the upper, it looked like it might be some sought of cutlass bearing.
I might want to pull it and replace in the fall.
Reply
Chris D.
May 29, 2016 at 10:13 am
Mark: There really is no upper bearing. It is a tube, pvc I presume glassed into place. It can be seen by sticking your head into the bilge area with the step removed with a flashlight. This tube wears too. Mine was anyway as were others on other boats I owned. To remove the rudder the lower skeg/pintle must be taken off to a greater or lesser degree and the rudder dropped straight down. There is not enough flex in the shaft to remove the rudder with the skeg/ pintle in the way. Upper rudder shaft is over an inch of solid bronze. Then the skeg / pintle / bushing is rebuilt with fiberglass. Sounds somewhat harder than it is. (Or you can use the method I showed you in previous posts to replace the bushing) There are several ways to fix slop in the upper. Easy one that you can do with boat in the water in less than an hour? Take a liter plastic soda bottle, cut it into strips about 8″ long as I recall, remove your tiller casting on top of the rudder shaft and feed the soda bottle strips into the tube leaving some material bent over at the top so you can remove it if you ever want to. You will probably need a puller to get the casting off as it is on pretty good with a key as well. Make sure you put the soda bottle strips all around the tiller shaft so that the soda bottle becomes a sacrificial space filling bearing which can be replaced and will also eliminate any further wear on your upper tube. It also eliminates any water that may find its way up the tube in a following sea or while motoring.. It can be a seasonal check item if you wish after that. I sail my boat 1000 miles a year give or take a hundred or so and the soda bottle strips are still good, in that I still have only desirable play in the tube years later. If you want the harder and more complex method, let me know. cd
http://www.harborfreight.com/3-piece-two-jaw-puller-set-40966.html
A puller like the larger one pictured here will do the job with ease.
Jeff
There is not enough clearance to drop the rudder with the skeg in place, I tried
Sea- Finn hull #196 is for sale
Lower Bearing repair resolution: Thanks for the assist. The boat is repaired and back in the water now. As others pointed out, the rudder cannot be removed without cutting the skeg, but the lower bearing repair was quite possible. As advised, I lifted the rudder vertically enough that the lower end was free of the bearing/shoe on the skeg. I cleaned the hole, put tape across the top and bottom of the bearing, and then epoxied it back in place. As soon as the epoxy started to set, I dropped the shaft back into the bearing, and let it set completely. The bronze bearing was a bit worn, but the issue was that the bearing had come loose, and worn away the fiberglass around it. After a couple hours, all was tight. Rolled on a coat of bottom paint, and back in she went. I would have liked to do something more precise, but it is a firm fit that will last a couple of season. Top bearing is only slightly loose, but I will shim that shortly.
Jeff…Thanks for your update on your resolution,,very much a rarity around here. I bet it will last longer than a couple of years. Hope you are getting more wind down there than we have here. Calmest summer I can remember ever. And I’m getting old. That said the huricaines should start any minute. Chris
On my Q24 the bottom of the rudder is a pin that goes into the little hole at the bottom. It looks like it should have a bushing or bearing in there but there isnt anything – just the fiberglass (i guess) hole. Is this the design or is something missing?
Mine has a bronze bushing, which I was able to remove and re-epoxy in place by sliding the rudder up. Not an ideal design, but it has worked for many years.
QS24 Fleet. Working on commissioning my recently purchased QS24 and I’m looking for advice re: running lines aft. I thought this would be easy but the roof liner presents a major difficultly in terms of through bolting . What I’m thinking for season #1 are 3 turning blocks ( attached to mast.) , triple deck turning blocks, and triple rope clutch followed by a small winch, port side to handle the main halyard, reef line, and ? I will just semi-permanently belay the roller furling genoa halyard to the original equipment starboard mast mounted winch/cleat. The cabin roof will look like Swiss cheese once I finish drilling all of the necessary holes. Furthermore if the roof is balsa cored I will have to over drill and fill each hole with epoxy first, then re-drill the holes. Any thoughts, pics of your lines aft setups and what was done with the roof liner would be welcomed – Dave.
Dave: consider installing a halyard organizer plate under your current fitting. I use a mast hinge because I raise and lower my own mast. Dwyer mast, the company that provided the mast to QS sells them. Here is the website. https://www.dwyermast.com/items.asp?cat1ID=40&cat1Name=Hardware&familyID=19&familyName=Halyard+Organizer+Plates The larger one is the one you want. You attach 3 pulleys on each side via shackle. From there to Harken turning blocks, I used these http://www.harken.com/productdetail.aspx?id=5649&taxid=1329 From there straight through a triple rope clutch, I like Spinlock products then to a small winch. I used the smallest Andersen stainless steel model but I don’t think they make them any longer. Send me your email and I will send you pictures of my installation if you would like.
Chris; I have nothing against an organizer plate, except that I would then have to remove the mast step, disconnect and re-route mast wiring and drill more holes in the cabin roof. I’m hoping to launch as soon as possible, the only preparation being extra long halyards and then complete running the lines aft after sailing the boat for a while. In fact the previous owner left me with a never used custom made organizer plate with a cutout and collar for the mast which I could drop over the mast step without removing the step or wiring. Yes, I’d like to see your setup. My e-mail address is DPurnhag@Optonline.net. How did you handle the cabin liner when you mounted the hardware? Regards. Dave
Dave: No need to drill more holes for a halyard plate. Remove the mast yes. The aluminum casting has 2 screw holes and one wiring hole drilled in it on my boat. You simply position your casting on halyard plate and mark and drill the 3 holes in the appropriate placs and use your existing cabin top holes.. The wiring hole may require you to find someone with a drill press if you don”t have one. Any machinist will do it in 2 mins. Drill stainless slowly, with oil, and high drill pressure. Otherwise the metal will heat and harden. Not sure about the custom idea and collar you have. From your description I would not trust it raising my mast.
Regarding the headliner, There is at points 1/8″ or so of space between the headliner and the actual cabin top underside. Position your hardware with tape, test it with light lines/ cord to assure proper location, and then drill when satisfied. I stick cut down allen keys in the holes and remove about 3/8″ radius of core and fill with epoxy/silica mix and re-drill.
Then from the underside I use a cleaned out caulking tube, the cheap stuff from HD or Lowes for house painting which is water based. either blow out or push out the inner push part shorten it up to a couple of inches and fill with some epoxy/silica and shoot that into the space between the liner and cabin top.
Once that hardens you will have a rock hard and solid place to put your backing plate or stainless fender washers. On my Harken organizers I used fender washers but on the winches I put backing plates. All forces are in shear so the plate is probably unnecessary anyway but since I raise the mast with the winch I did not want to take any chances.
I will bring my camera today when I go to the boat and take some pics and forward.
Thanks Chris; I like your idea of filling the air gap with epoxy – except I have more like a 3/8″ air gap – so I may need a more viscous mixture – looking forward to your photos…I’ll take a photo of my unused organizer plate for what its worth. Dave
Dave: Epoxy and Silica https://www.amazon.com/System-Three-3105S16-Silica-Thickener/dp/B013K2WU9S/ref=sr_1_1?ie=UTF8&qid=1496936610&sr=8-1&keywords=silica+for+epoxy ..make as viscous mixture as you like. Far superior to wood flour. Weighs little costs a bit and goes a long way. I had areas of 3/8 as well. You can fill anything with the mixture. Actually you want it to spread above the headliner so you have essentially a solid sandwich from deck to headliner in all areas under the hardware. It will be rock solid. Pictures to your email shortly.
Dave: Let me know if you got the pics. I sent about 10 meg..sometimes files that big get rejected. cd
I’ve worked with the silica additive before Chris, great stuff. might actually have some in my epoxy box.
Hi Chris: I’m also interested in seeing pictures of the plate and hinge. I’d like to be able to raise and lower the mast myself.My email is crunci@runcigroup.com Thx for all of our great posts! – Chris R
Chris R Things are still covered. As soon as I get up there I’ll take some photos of the hinge plate and the frame I use and give trying to describe it a go. Less than a week or two and I should be at it. Meanwhile Dwyer Mast website https://www.dwyermast.com/items.asp?cat1ID=20&cat1Name=Masts&familyID=43&familyName=DM-500+Mast
This page is the one for the mast Quickstep used. It was specified by Brewer.
https://www.dwyermast.com/itemdetails.asp?itemID=539
Thanks!
Dave: An afterthought. If you use epoxy to fill above headliner it’s probably best to use slow speed hardener and monitor the level of heat that develops while it cures. I remembered my headliner got rather hot and I had a moment of worry running into the house to get some ice and a towel to hold it up to the underside when I thought it would begin to melt the headliner. In the end it did not, but I did mine in the winter . With 3/8 inch you will develop a good deal of heat up there during the hottest part of the cure. Curing epoxy will easily melt a plastic container or worse.
Hi Chris
I am interested in setting up my Quickstep so I can raise and lower the Mast myself also. Would appreciate seeing how you did it. Email is LLLJrMD@aol.com.
Thanks
Lee
Lee: Things are still covered. As soon as I get up there I’ll take some photos of the hinge plate and the frame I use and give trying to describe it a go. Less than a week or two and I should be at it. Meanwhile Dwyer Mast website https://www.dwyermast.com/items.asp?cat1ID=20&cat1Name=Masts&familyID=43&familyName=DM-500+Mast
This page is the one for the mast Quickstep used. It was specified by Brewer.
https://www.dwyermast.com/itemdetails.asp?itemID=539
Does anyone in the 24ft fleet have a bowsprite attached to their Quick step? If so , how can I go about this without breaking the bank. John Q
John: Why..the boat sails well as is, probably won’t after you mess up the geometry with a sprit. Looks pretty fair too. Ted Brewer is one of the best naval architects. Compac designed several boats that did not sail worth a damn until they retrofitted the newer models with bowsprits. Their C23 was one of them. I am sure I could easily fit a C23 sprit to my Q24 if I had enough to drink that weekend. Who knows might look good and only ruin the boats balance a little bit. Here is the Compac address for the bowsprit kit for a 23. You will also need a bobstay.
Click to access AADHttjwMACdw5Voo2NYBoLVa
And a new forestay / furler modifications assuming you will move the headstay to the sprit. And a modification to your bow pulpit. Sail mods too prob.
Hello Quickstepers,
I am the prior owner of number 123 made by Dyer (with a Shannon crew, I’m told) a beautiful diesel model, which I miss.
I have two sails and a Fairclough cover for sale.
1.Never used tanbark (red) hank on storm sail, very heavy duty. Luff 192” Leech 151” foot 82”.
$250 seems reasonable but open to thoughts.
2. Older, decent, never patched tanbark, hank on genoa. Luff 328 (27’4”) Foot 178” ( 14’ 10”).
$200 seems reasonable, but open to thoughts.
These were measured in my small living room and are close but not exact.
These are in Boston.
Feel free to contact me. David Rosmarin
rosmarin.david@gmail.com
Anyone have a marine head in their Q24 who would take pictures of the installation including positioning and plumbing and tankage? I want to install one in my 24 but local boats all have porta pots. Thanks.
Chris. I have 1 photo of an installed marine head for a QS24 I was interested in before buying my present ‘porta potti’ model. It doesn’t help much in terms of plumbing or tankage but may be useful . I don’t know how to post a picture here but you can E-Mail me at DPurnhag@Optonline.net. Dave